
Trivet
Trivet - using the direct method
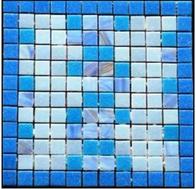
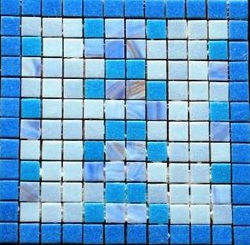
A mosaic trivet for the centre of the table is both decorative and functional.
This is a great project to start with because you don’t need any tools and there is no cutting required.
I have chosen four shades of blue but choose the colour palette you like and play with a design.
I have used glass tiles because of their beauty and because, unlike ceramic tiles, they do not stain and are heat resistant.
|
Materials
Vitreous Glass Tiles - Border = 44 tiles - Main colour = 57 tiles - Second colour = 24 tiles - Third colour = 20 tiles Base Board, either MDF or plywood 260mm x 260mm Permanent marker |
Ruler
Craft Knife PVA and brush Grout and squeegee Clean cloth Black enamel paint |
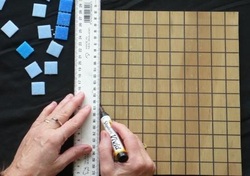
- Draw the grid on the base board using the permanent marker and ruler.
- Score the base board using a craft knife - this will give more grip for the tiles.
- Play with you tiles until you have a design you like.
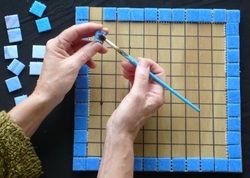
- Start with the border colour. Glue the tiles down by buttering the back of each tile with the PVA glue and placing within the grid lines. You may want to dab a little glue onto the base too to ensure a good grip.
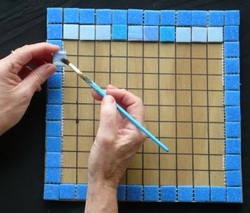
- Continue with your design, buttering the back of each tile before you place it on the grid.
- Leave the completed piece for 24 hours to allow the glue to dry thoroughly before grouting.
- Grouting – mix the grout as per package instructions or view instructions on www.everythingmosaicnz.com/grout.html
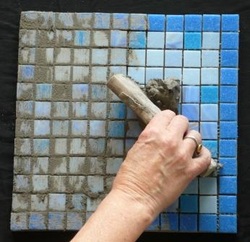
- Spread the grout evenly onto the tiles and using a squeegee press the grout into all the spaces (interstices). Be sure to also grout the edges.
- When the entire surface is covered with grout use the squeegee to remove the excess grout.

- Once a haze begins to form on the tiles (usually within 10 minutes) it is time to use a clean soft cloth to remove the grout from the surface of the tiles.
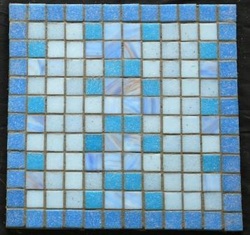
- Leave for an hour and then give the trivet a final buff with a soft clean cloth.
- Paint the edges and backside of the trivet with black enamel paint.
If you would like this pattern as a pdf file click the link below to download it.
| trivet.pdf |
